These instructions are for informational purposes only and if used, must be followed precisely. If you continue to have errors on your system, we recommend that you contact your computer manufacturer or a local computer professional for further assistance at your own discretion. Intuit assumes no liability or expense. All the steps below are at customer’s own risk.
Read these steps in their entirety before beginning this task. If you aren't comfortable with anything in this article, please STOP and consult a local computer professional. These instructions are being provided to help you with a very specific Windows Error (193: Extractor CreateProcess). You'll be viewing typically hidden system files and must proceed with caution and patience.
Some TurboTax Desktop customers may be experiencing an issue/error when attempting to install TurboTax Desktop Individual or Business. In most cases, when installing from CD or download, they are seeing one of the following:
- 193: Extractor CreateProcess Error
- The install will begin and stop without progressing and will show no error messages.
There are other reasons that the second issue above may have occurred. To determine if Error 193 has caused your issue, please follow these steps.
As we move through this article, there are some things you will need to do:
- Anything that is typed into the Search box will need to be run with the option of Run as Administrator—please be certain to choose this option.
- You must be viewing Hidden Items in File Explorer. There are screenshots in this article to assist with this. (Please reverse this procedure when you are finished to re-hide previously hidden system files and folders.)
- Search is typically located to the right of the Windows Start button. If you do not see it, right-click Start and choose Search.
- When clicking, left-click unless instructed to right-click.
Instructions to fix Windows Error 193
Let’s begin.
- Reboot your PC. Once back into Windows and your desktop has reloaded, continue.
- Right-click the Windows Start button.
- Select Search.

4. Type c:\users.

- Press Enter. (This will put you in your Users directory subtree inside File Explorer and you will see the username you use when logging into your computer, typically along with Public, Administrator, Default, and possibly some other folders.)
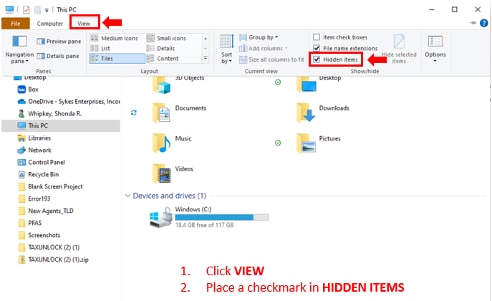
- Select the View menu.
- Look in the ribbon (at the top of the File Explorer screen) toward the bottom right (as indicated in the following image) for Hidden Items and ensure there is a checkmark. This allows viewing of system files. If it is not there, place a checkmark in the box. Don’t forgot to undo this when you are done.
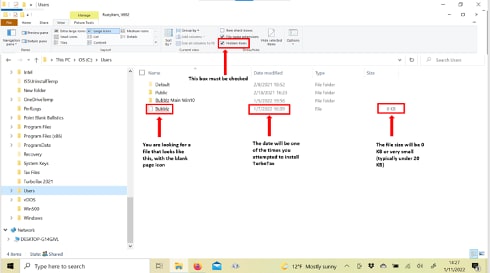
Look for the file indicated here. You are looking for a file that has the blank page icon and has a portion of your username. It will have a size of 0 KB–16 KB typically (see the following image).
If you do not have it—stop! You are not impacted by Error 193. If you do have the file, continue through the rest of the instructions. DO NOT delete the file yet.
Now that you have confirmed you are impacted by the Error 193 and you have the file mentioned previously, let’s proceed.
- Right-click the Windows Start button.
a. Select Search.
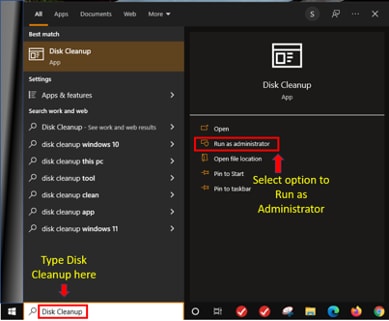
b. Type Disk Cleanup
c. Select the option to Run as Administrator.
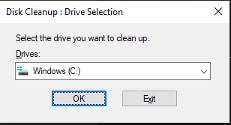
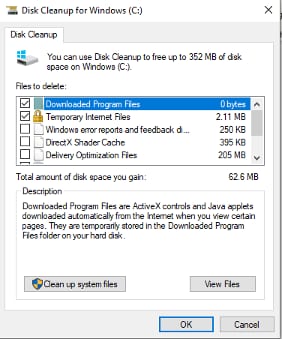
d. Select OK for the C: drive on this screen.
e. Select Downloaded Program Files, Temporary Internet Files, Temporary Files, and Thumbnails and select OK.
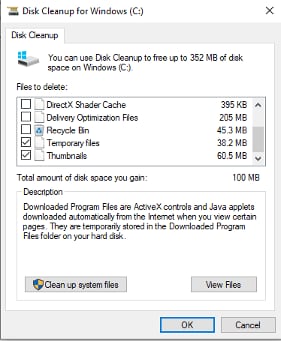
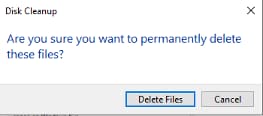
f. Select Delete Files.
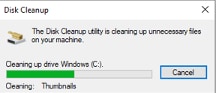
g. You will see a message that Disk Cleanup is cleaning up your drive, and then it will disappear when cleanup is complete.
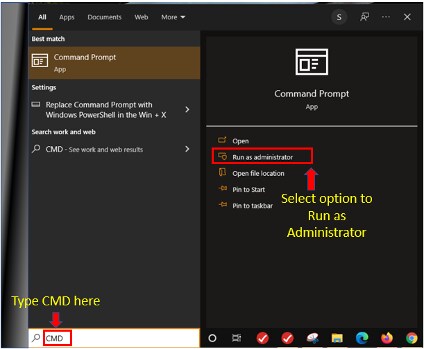
- Right-click the Windows Start button.
a. Select Search.
b. Type CMD
c. Select the option to Run as Administrator.
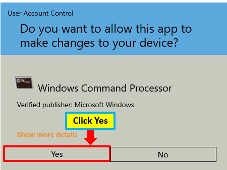
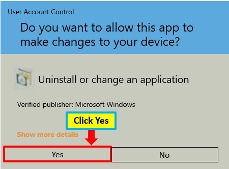
d. You will see a User Account Control asking you to make changes to Windows. Select Yes to allow the system to make changes.
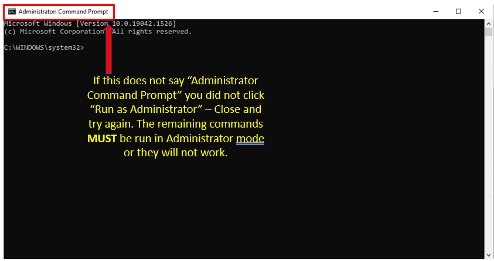
e. The following commands MUST be run with the Run as Administrator option or they will not work.
• You will see the C:\WINDOWS\system32> prompt. The following commands are not case sensitive:
• Type CD\
• Press Enter.
• The prompt will now change to C:\

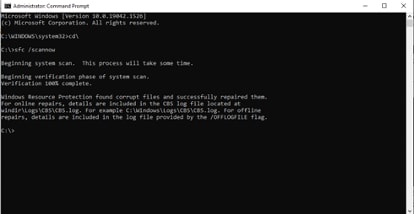
- Type SFC /scannow (please note there is a space between SFC and /scannow).
- Press Enter (you will see a screen like the following, indicating the scan is beginning).
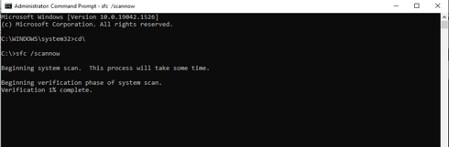
- This scan can take from several minutes to quite some time (depending on the size of your hard disk and the number of files you have). Windows System File Checker is running and attempting to verify the integrity of your files. If any corruption is found, it will attempt to repair the files. You will see one of three results:
- Windows Resource Protection could not perform the requested operation. If you see this, you need to consult a local computer professional. Do not proceed further.
- Windows Resource Protection found corrupt files and successfully repaired them
- Windows Resource Protection did not find any integrity violations
Once you receive either message 2 or 3 above, you may proceed.
Type exit to close the Command Prompt.
Now that you have repaired any corrupt files, you are ready to proceed:
- Right-click the Windows Start button.
- Select Search.
- Type appwiz.cpl
- Press Enter.
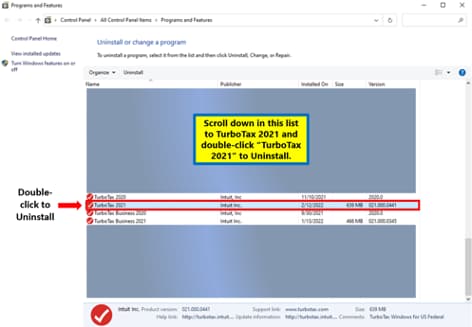
- You will now be in Programs & Features where you will see a list of programs and features installed on your computer.
- Scroll down in the list to TurboTax 2021 and double-click to begin the uninstall.
- You will be presented with a User Account Control asking if you’re sure you want to Uninstall TurboTax. Select Yes.
- If the Uninstall asks you to reboot, select option to Reboot later and Close.
- Right-click the Windows Start button.
- Select Search.
- Type File Explorer
- Press Enter.
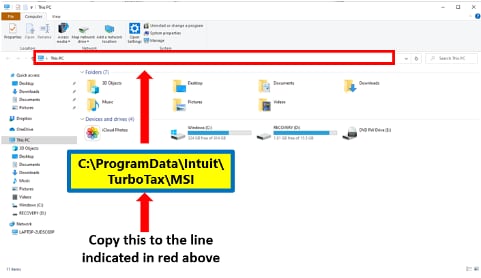
- You will see a screen that looks like this:

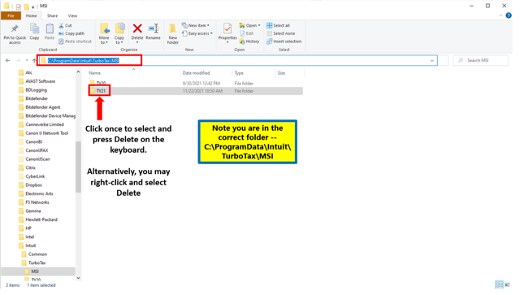
14. Copy the following and paste into the area indicated by the red box in the following image, and then press Enter: C:\ProgramData\Intuit\TurboTax\MSI
15. Locate the folder TY21 and press Delete.
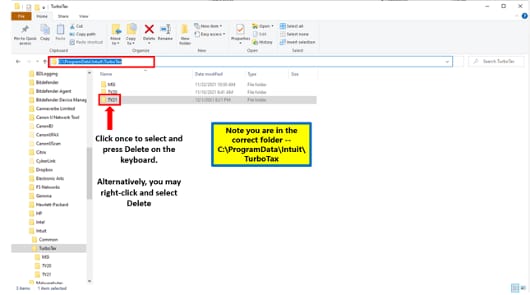
- Copy the following and paste into the area indicated by the red box in the following image, and then press Enter: C:\ProgramData\Intuit\TurboTax
- Locate the folder TY21 and press Delete.
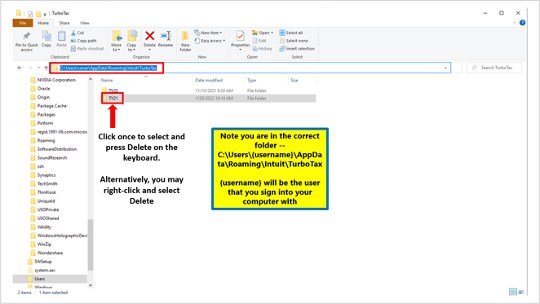
- Copy the following and paste into the area indicated by the red box in the following image, and then press Enter:
C:\Users{username}\AppData\Roaming\Intuit\TurboTax
Note: You will change the {username} to your username—the name that you use on your own computer. - Locate the folder TY21 and press Delete.
- Once all the TY21 folders have been deleted following the preceding instructions, reboot your PC.
You are now almost at the final step. After Windows has reloaded all your startup programs, etc. and is ready to go:
- Right-click the Windows Start button.
- Select Search.
- Type File Explorer
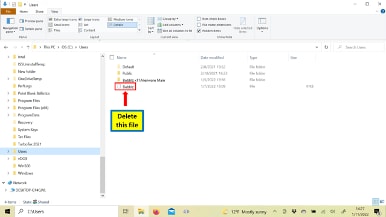
- Type C:\Users
- Press Enter.
- Locate and delete the following file (the file from step 1 in this article).
- Right-click the Windows Start button.
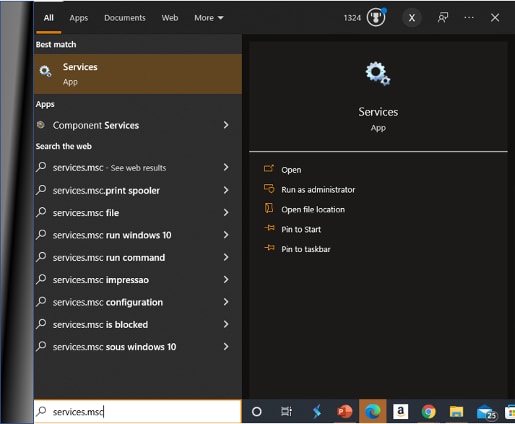
- Select Search.
- Type services.msc
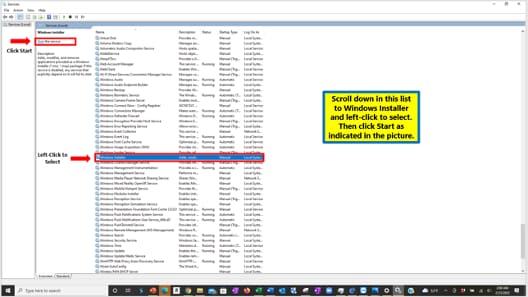
- Scroll down in this list to Windows Installer.
- Select Start this Service.
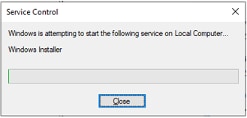
- You will see a window like this:
- Right-click the Windows Start button.
- Select Search.
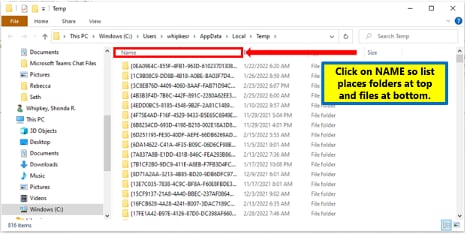
- Type %temp%
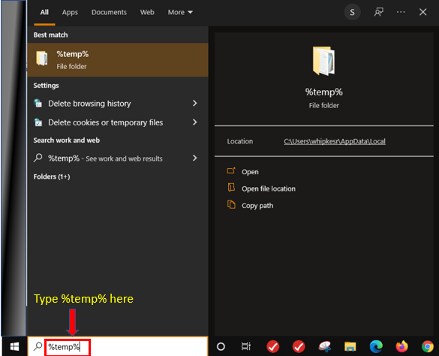
16. In the screen that opens, select the Name column to put the folders at the top.
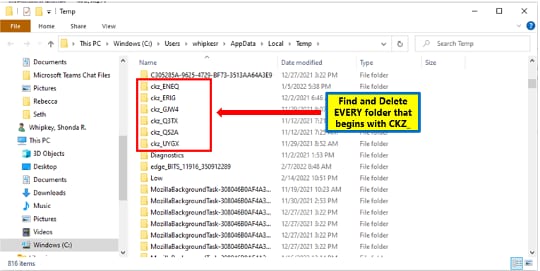
17. Select and remove any folder beginning with CKZ_
- Disconnect any USB hard drives prior to attempting reinstallation of TurboTax.
- Open Google Chrome.
- Go to turbotax.com/mydownloads
- Sign in to your TurboTax account and select Downloads.
- Download a fresh copy of TurboTax but DO NOT launch the program from your browser.
- Close Chrome.
- Open File Explorer.
- Browse to Downloads.
- Right-click the file you just downloaded and select Run as Administrator.
- Continue installation as normal.

